IntelliJ IDEA Setup

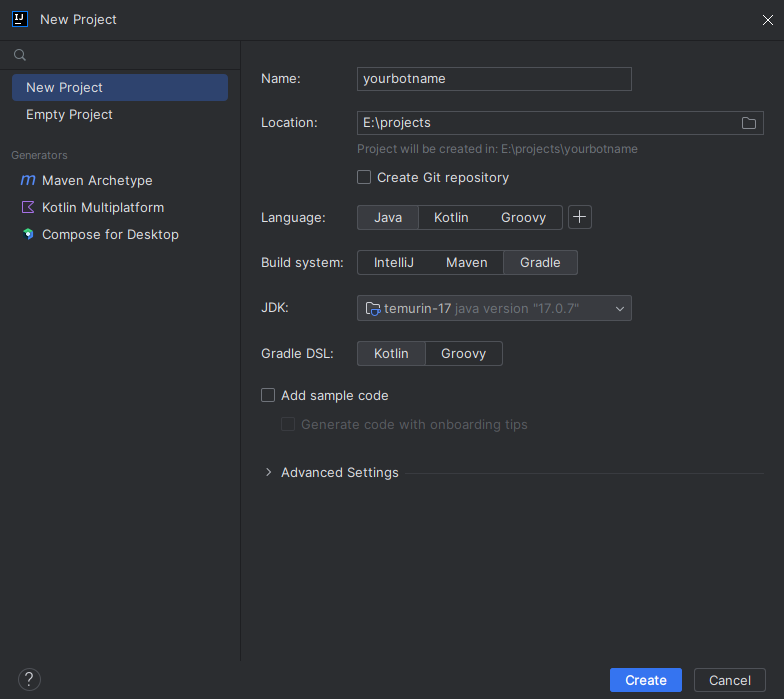
- Navigate to "New Project" from any view
-
Select Gradle -> Java as the type of Project and make sure the correct JDK is selected (Java 8 or higher)
-
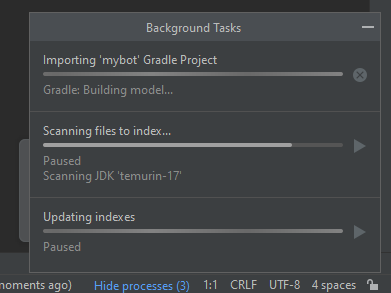
Let IntelliJ index your project.
-
Open
build.gradle.kts -
Populate the build file with the following
plugins { application id("com.gradleup.shadow") version "8.3.1" } application.mainClass = "com.example.discordbot.Bot" // (1) group = "org.example" version = "1.0" val jdaVersion = "JDA_VERSION_HERE" // (2) repositories { mavenCentral() } dependencies { implementation("net.dv8tion:JDA:$jdaVersion") } tasks.withType<JavaCompile> { options.encoding = "UTF-8" options.isIncremental = true // Set this to the version of java you want to use, // the minimum required for JDA is 1.8 sourceCompatibility = "1.8" }-
Replace the
mainClassvalue with the path to your main class later on! -
Replace the
JDA_VERSION_HEREwith the one mentioned in the latest release
-
-
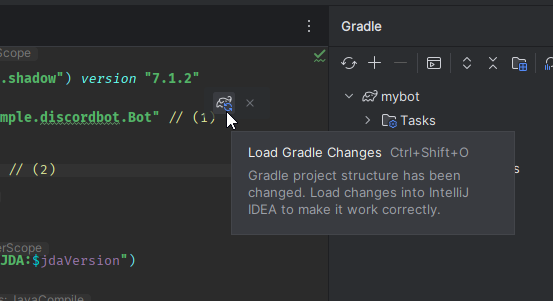
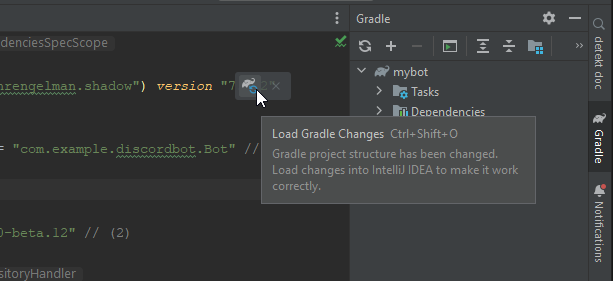
Reload Gradle and wait for it to finish
-
If IntelliJ IDEA didn't already do so automatically, set up a source folder as
src/main/java - Create your group package. Example:
com.example.discordbot - Make your main class. Example:
Bot.java. Your directory tree should look like this:ProjectName -> src/main/java -> com/example/discordbot -> Bot.java -> gradle/wrapper -> gradle-wrapper.properties -> gradle/wrapper -> gradle-wrapper.jar -> build.gradle.kts -> settings.gradle.kts - Configure the
mainClassvalue in thebuild.gradle.ktsto your class. Example:com.example.discordbot.Bot -
To build your finished project simply use the
shadowJartask in your Gradle tool window on right hand side of your editor. > You can also run your project with therunGradle task!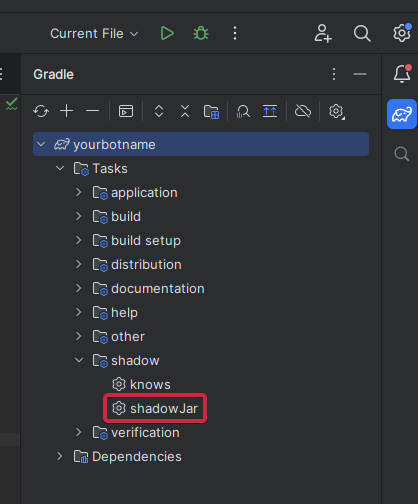
-
This will build a jar in
build/libs. The one with the-allsuffix is the shadow jar.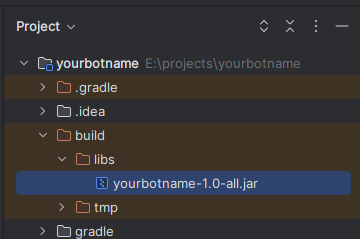
- Continue with Getting Started
- Navigate to "New Project" from any view
-
Select Gradle -> Java as the type of Project and make sure the correct JDK is selected (Java 8 or higher)
-
Let IntelliJ index your project.
-
Open
build.gradle.kts -
Populate the build file with the following
plugins { application id("com.gradleup.shadow") version "8.3.1" } application.mainClass = "com.example.discordbot.Bot" // (1) group = "org.example" version = "1.0" val jdaVersion = "JDA_VERSION_HERE" // (2) repositories { mavenCentral() } dependencies { implementation("net.dv8tion:JDA:$jdaVersion") } tasks.withType<JavaCompile> { options.encoding = "UTF-8" options.isIncremental = true // Set this to the version of java you want to use, // the minimum required for JDA is 1.8 sourceCompatibility = "1.8" }-
Replace the
mainClassvalue with the path to your main class later on! -
Replace the
JDA_VERSION_HEREwith the one mentioned in the latest release
-
-
Reload Gradle and wait for it to finish
-
If IntelliJ IDEA didn't already do so automatically, set up a source folder as
src/main/java - Create your group package. Example:
com.example.discordbot - Make your main class. Example:
Bot.java. Your directory tree should look like this:ProjectName -> src/main/java -> com/example/discordbot -> Bot.java -> gradle/wrapper -> gradle-wrapper.properties -> gradle/wrapper -> gradle-wrapper.jar -> build.gradle.kts -> settings.gradle.kts - Configure the
mainClassvalue in thebuild.gradle.ktsto your class. Example:com.example.discordbot.Bot -
To build your finished project simply use the
shadowJartask in your Gradle tool window on right hand side of your editor. > You can also run your project with therunGradle task!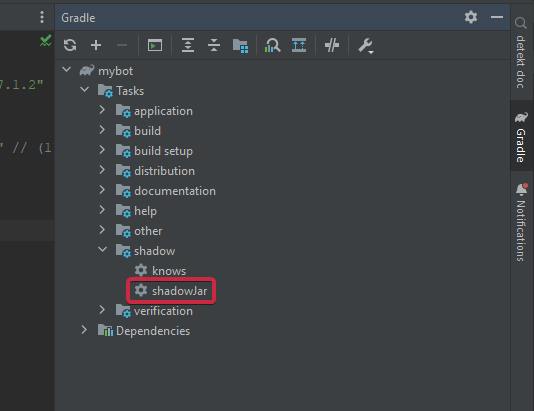
-
This will build a jar in
build/libs. The one with the-allsuffix is the shadow jar.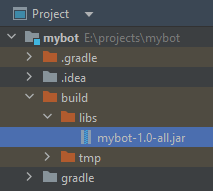
- Continue with Getting Started